Are you wondering how to lawn sprinkler system installation could benefit your property? Here’s a quick rundown:
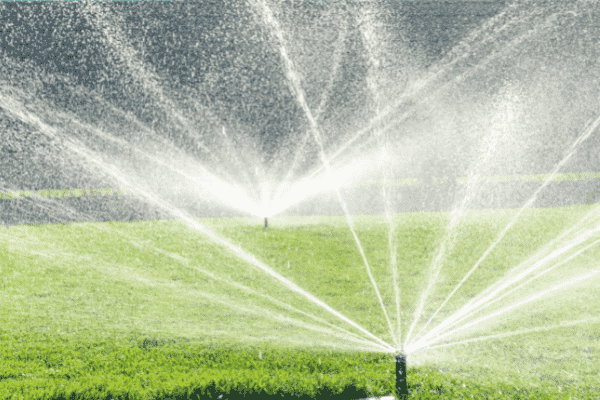
Installing a lawn sprinkler system is crucial for maintaining a lush and vibrant lawn. Picture this: a beautiful, green landscape that requires minimal manual intervention. That’s what an effective sprinkler system can offer. It ensures your lawn receives the right amount of water, promoting healthier plants and conserving water at the same time.
By automating your watering process, you’ll save both time and energy, freeing you up for more enjoyable activities. Moreover, a well-maintained lawn can boost your property’s curb appeal and even increase its market value.
I’m Scott McLeod, the owner of McLeod Landscaping, with over 30 years of experience in landscape design and irrigation system installation. I specialize in how to lawn sprinkler system implementations that are both efficient and aesthetically pleasing.
Stay tuned as we dive deeper into the details of planning, choosing, and installing your own DIY lawn sprinkler system.

Before you start digging holes and laying pipes, you need a solid plan. Let’s break down the essential steps for planning your DIY lawn sprinkler system.
First things first: check your water pressure and flow rate. These will determine how many sprinkler heads you can support and how efficiently your system will operate.
Knowing these numbers helps you avoid overloading any zone with too many nozzles.
Your service line diameter also plays a role in your system’s efficiency. Typically, a 3/4 inch PVC Schedule 40 pipe works well for most residential lawns. However, using a 1-inch pipe can be beneficial if you have a larger area or if you are concerned about maintaining high water pressure.
Creating a detailed sketch of your yard is crucial. It helps you visualize where everything will go and ensures you don’t miss any important spots.
Quick Tips for Drawing Your Plan:
– Use a printed map of your property: This provides a more accurate layout.
– Keep it to Scale: This makes it easier to plan zones and placements.
– Mark Key Features: Note the location of trees, flower beds, hardscapes, and slopes.
– Designate Zones: Different plants have different water needs. Group turf, trees, and shrubs separately.
– Overlap Sprinkler Heads: Aim for a 50% overlap to ensure even coverage.
Before you start, check your local ordinances on lawn water usage. Rules can vary greatly depending on where you live. Some areas may have restrictions on water usage during certain times of the year.
Don’t forget to contact 811 or your local utility companies to mark your underground lines a few days before you start digging. This service is free and can save you from accidentally hitting utility lines, which could result in losing power, telephone service, cable, or internet.
When it comes to installing a lawn sprinkler system, you have two main options: purchasing a sprinkler system kit or building your own system from scratch.
Sprinkler system kits are a convenient choice for many homeowners. These kits come with everything you need to set up a basic system, including pipes, sprinkler heads, and a controller. They are designed to be user-friendly, making them a great option for DIY enthusiasts.
One popular example is the Rainbird 32ETI kit, which many users find effective for covering small to medium lawns. It’s easy to install and comes with detailed instructions.
If you have a larger or more complex lawn, you might prefer to build your own sprinkler system. This approach allows for more customization to meet the specific needs of your landscape. You can choose the exact types of pipes, sprinkler heads, and controllers that are best suited for your yard.
Choosing the right sprinkler heads is crucial for the efficiency of your system. Different areas of your lawn may require different types of heads:
To ensure efficient watering, divide your lawn into zones. Each zone runs one at a time to maintain adequate water pressure and flow. Here’s how to plan your zones:
Let’s say your home’s water capacity is approximately 10 gallons per minute (GPM). If you are using multiple stream heads that consume 2 GPM each, you can run five heads per zone. For higher consumption heads, like those using 3 GPM, limit the zone to three heads.
In the next section, we’ll cover the essential tools and supplies you’ll need for your DIY lawn sprinkler system installation.
Ready to dive into the nuts and bolts of installing your lawn sprinkler system? Here’s a breakdown of the essential tools and supplies you’ll need to get the job done right.
PVC Pipe: This is the most common type of pipe used in underground sprinkler systems. It’s strong and durable, making it ideal for southern climates where freezing isn’t a concern. PVC Schedule 40 is a popular choice due to its strength.
Polyethylene Pipe: Known as black roll pipe, this flexible option is perfect for colder northern areas. It can handle the expansion and contraction that comes with freezing temperatures.
Elbows and Tees: You’ll need these to change the direction of your PVC piping. Elbows allow for 90-degree turns, while tees let you split the pipe into two different directions.
Manual Controllers: These allow you to set watering schedules manually. They’re straightforward but require you to adjust them based on weather conditions.
Smart Controllers: These are the high-tech option. They automatically adjust watering schedules based on real-time weather data. Some models are even Wi-Fi enabled, letting you control them via an app on your phone.
Variety of Heads: The type of sprinkler heads you need will depend on the area you want to water. Options include fixed spray heads, rotating heads, and drip emitters. Each type has different spray patterns and coverage areas.
Connection Essentials: Tubing or risers connect the sprinkler heads or drip lines to the main PVC pipe. They ensure that water flows efficiently from the main line to the sprinkler heads.
Flow Control: Valves control the water flow through your system. They open and close to allow water to enter different zones of your sprinkler system.
Valve Connections: The manifold connects multiple valves to the main water supply line. It branches out into several lines, each controlled by a valve.
Protection and Access: A valve box provides easy access to your valves while protecting them from the elements. This makes maintenance and repairs much simpler.
Control Center Connection: You’ll need wiring to connect the valves to the control center. The control center sends signals to open and close the valves as needed.
Water Management: Drains keep water out of the pipes when they’re not pressurized. Manual and automatic drains are installed at the end of sprinkler lines and at low points to prevent water buildup.
Safety First: Many areas require a backflow preventer to keep water from flowing back into your home’s water supply. This is crucial for preventing contamination.
Next, we’ll guide you through the step-by-step installation process. Get ready to mark out your sprinkler heads and dig those trenches!
Installing a lawn sprinkler system can seem daunting, but breaking it down into steps makes it manageable. Here’s a simple guide to help you get started.
First, mark where your sprinkler heads and pipes will go. Use wooden stakes or landscape flags to mark these spots.
Next, dig trenches for your pipes. You can do this by hand or rent a trenching machine.
Now, connect your system to the water supply. You have two options: a spigot or the main water line.
Dig a hole for the valve manifold and attach it to the main water supply line.
Lay PVC pipes in the trenches and place sprinkler heads at marked spots.
Before installing the sprinkler heads, flush the system to remove any dirt or debris.
Attach the sprinkler heads to your system.
Wire the controller to the valve manifold according to the manufacturer’s instructions.
Test your system to ensure everything works correctly.
Once everything is working, fill the trenches with dirt and replant any sod you removed.
Regular inspection and maintenance are key to keeping your system running smoothly. Next, we’ll cover how to maintain your lawn sprinkler system, including seasonal adjustments and troubleshooting common issues.
Regular inspection and maintenance are key to keeping your system running smoothly. Let’s dive into how to keep your lawn sprinkler system in top shape, including seasonal adjustments, winterization, spring turn-on, and troubleshooting common issues.
Regularly inspect your sprinkler system to catch problems early. Here’s what to look for:
Check the Water Pressure: Ensure your system’s water pressure is between 40 to 65 PSI. If your sprinkler heads produce mist instead of a spray, the pressure is too high. Conversely, if they don’t pop up or spray far enough, the pressure might be too low.
Inspect Sprinkler Heads: Look for clogged or damaged heads. Clogged heads can be cleaned, while damaged ones should be replaced.
Look for Leaks: Signs of leaks include water pooling in the yard, damp areas, or differences in water pressure. Fix leaks promptly to avoid wasting water and increasing your bill.
Adjust your sprinkler settings based on the season to ensure efficient watering.
Spring: As temperatures rise, increase the watering frequency. Check for any damage caused by winter and ensure all parts are functioning correctly.
Summer: Watering needs increase. Set your system to water early in the morning or late in the evening to minimize evaporation.
Fall: Gradually reduce watering as temperatures drop. Prepare your system for winterization.
Winterizing your system is crucial to prevent damage from freezing temperatures.
Auto-Drain Valves: If your system has auto-drain valves, turn off the water supply and open the valves to drain excess water.
Manual Drains: Use an air compressor with 50 to 100 PSI to blow out any remaining water from the system. Open the valve manifolds and run air through each zone until clear.
Turn Off Timer: Ensure the timer is off to prevent water from entering the system during winter.
Get your system ready for the growing season with a proper spring turn-on.
Even with regular maintenance, problems can arise. Here are some common issues and solutions:
Uneven Watering: This could be due to clogged nozzles or damaged heads. Clean or replace them as needed.
Low Water Pressure: Check for partially closed valves or a damaged pressure regulator. Ensure all valves are fully open.
Leaking Sprinkler Heads: Typically caused by damaged seals or valves. Replace the affected components.
No Water: Check the controller and solenoid valves. Ensure the controller is programmed correctly and the valves are not clogged.
Overspraying or Underspraying: Adjust the spray pattern and direction of the heads. Use special nozzles to prevent overspray.
Maintaining your lawn sprinkler system doesn’t have to be daunting. With regular inspection, seasonal adjustments, proper winterization, and timely troubleshooting, you can keep your system running efficiently all year round.
Next, we’ll answer some frequently asked questions about planning and installing a home lawn sprinkler system.
The number of sprinkler heads you can install depends on several factors. Key considerations include your home’s water flow rate (measured in gallons per minute or GPM) and water pressure (measured in pounds per square inch or PSI).
Why does this matter? Overloading your system with too many heads per zone can lead to poor performance, meaning none of the heads will spray water effectively.
Steps to Determine the Right Number:
Pro Tip: Each sprinkler head’s specifications will tell you how many GPM it uses. Ensure you don’t exceed your system’s capacity.
Choosing the right pipe is crucial for an efficient and durable sprinkler system. Here are the top options:
Why these materials? All three types are readily available, easy to work with, and less expensive than other options.
Pro Tip: In areas prone to freezing, black roll pipe is the best choice to prevent pipe bursts.
Understanding the size of your lawn helps in planning your sprinkler system effectively. Here’s a quick guide:
Why does size matter? Knowing your lawn’s size helps you determine the number of zones, the length of piping, and the number of sprinkler heads needed.
Pro Tip: Measure your lawn accurately and sketch a layout to plan your zones and head placement efficiently.
By understanding these FAQs, you’re better equipped to plan and install a lawn sprinkler system that meets your needs. Now, let’s dive into the step-by-step installation process to bring your irrigation plans to life.
Benefits of DIY Installation
Installing a lawn sprinkler system yourself can be a rewarding project. Not only do you save on labor costs, but you also gain a deeper understanding of your yard’s irrigation needs. Here are some of the key benefits:
McLeod Landscaping: Your Partner in Professional Landscaping and Irrigation Services
While DIY installation has its perks, it’s not for everyone. If you find the process overwhelming or simply don’t have the time, McLeod Landscaping is here to help.
We specialize in professional irrigation system installations and repairs. Our team of experts can design and install a system tailored to your lawn’s specific needs, ensuring efficient water distribution and optimal plant health.
Whether you’re taking the DIY route or seeking professional help, having a well-designed sprinkler system is key to maintaining a lush, green lawn. If you need assistance, don’t hesitate to reach out to McLeod Landscaping. We’re here to turn your irrigation dreams into reality.

For more information about our services and how we can help you achieve the perfect lawn, visit our irrigation systems page.
Contact McLeod Landscaping today at (978) 640-0957 or click here to schedule a consultation for retaining wall installation. Let our experienced team design and install a functional and visually appealing retaining wall that enhances your landscape.
1881 Main St Unit 1, Tewksbury, MA 01876